Superusers can manage custom fields in the admin area. Click the "Custom Fields" link in the Articles section of the left navigation bar to open the "Custom Fields" page.
You can create, edit or delete custom fields in this section. This section contains columns which are explained below:
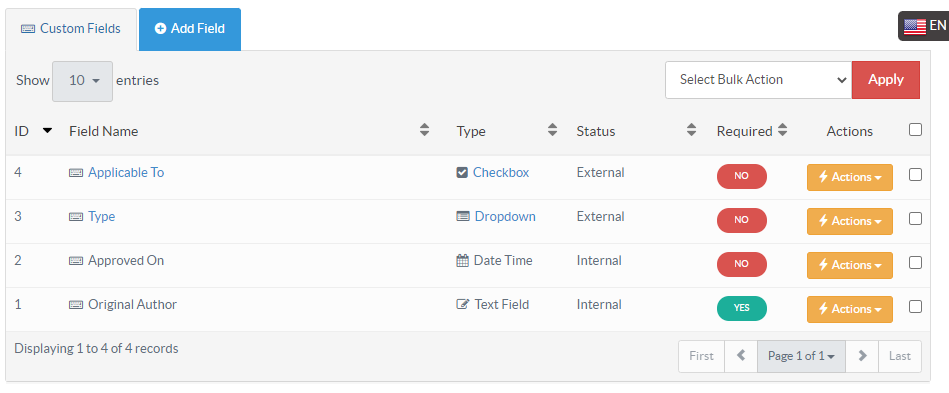
ID: This column displays the serial ID of the custom field in the database.
Field Name: This column displays the name of the custom field. This name is displayed along with its values on the article page at the front end of the knowledge base.
Type: This column displays whether the custom field is of type text, drop-down or check box.
Status: Internal value in the column showcase that the field is for internal users and is visible only to logged in members.
Required: Yes label represents that this field is mandatory and the article creator has to fill value for this field while article creation/update, whereas, no represents an optional field. You can click on the label to change its value.
Actions: This column contains two operations that can be performed on custom fields:
Edit - Click to modify the details of a custom field.
Delete - Click to remove the custom field from the knowledge base. After that, this custom field will no longer display with published articles.
You can perform the same action on more than one custom field using the "Select Bulk Action" drop-down. For this, mark the checkboxes corresponding to custom fields on which operation is required and then select the desired bulk action and click on the "Apply" button.
Article ID: 88
Created: July 28, 2016
Last Updated: December 16, 2021
Author: Gurjeet Kaur [gurjeet@phpkb.com]