Configuring Auth0 as an OAuth Provider in PHPKB
Estimated Reading Time: 4 MinutesHow to configure Auth0 as an OAuth provider in PHPKB knowledge base software? In this tutorial, you will learn how to configure Auth0 as OAuth Provider with PHPKB OAuth plugin.
PHPKB OAuth Authentication Plugin
The OAuth 2.0 authentication plugin enables users to log in using their Google, Microsoft, Facebook, or any other account via buttons on the login page of your knowledge base.
Interested to buy this plugin? Contact Us for Licensing & Pricing.
PHP Requirements:
- PHP 7.0 or later
- CURL extension
- JSON extension
- OpenSSL extension
Download & Installation:
Extract the package (that you received after purchasing this plugin), copy all the files & folders, and paste them at their respective locations under the installation directory of PHPKB Knowledge Management Software on your server. There is a new folder, called ‘add-ons’ (applicable to PHPKB v9.0), copy that and put it directly under the root folder (i.e. outside /admin/ folder) of the PHPKB package.
Steps:
- Log in to the Administrator Control Panel of PHPKB as a Superuser, go to Tools > OAuth / OpenID-Connect plugin.
- After successfully logging in to PHPKB (at Step 1), open a new tab/window and log in to Auth0 Dashboard, as we are going to configure some of the settings parallel.
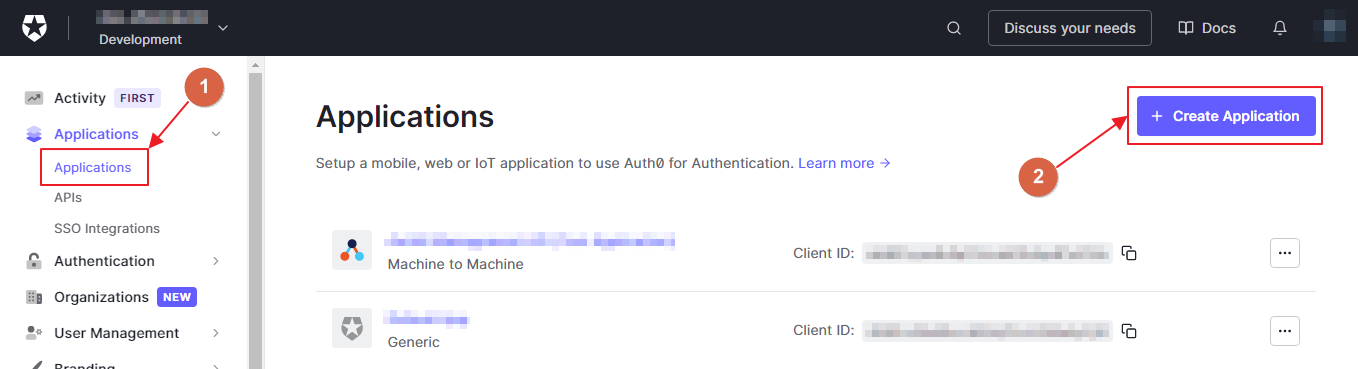
- Click Applications > Applications (which is available in the Left-Sidebar menu) and then click Create Application button.
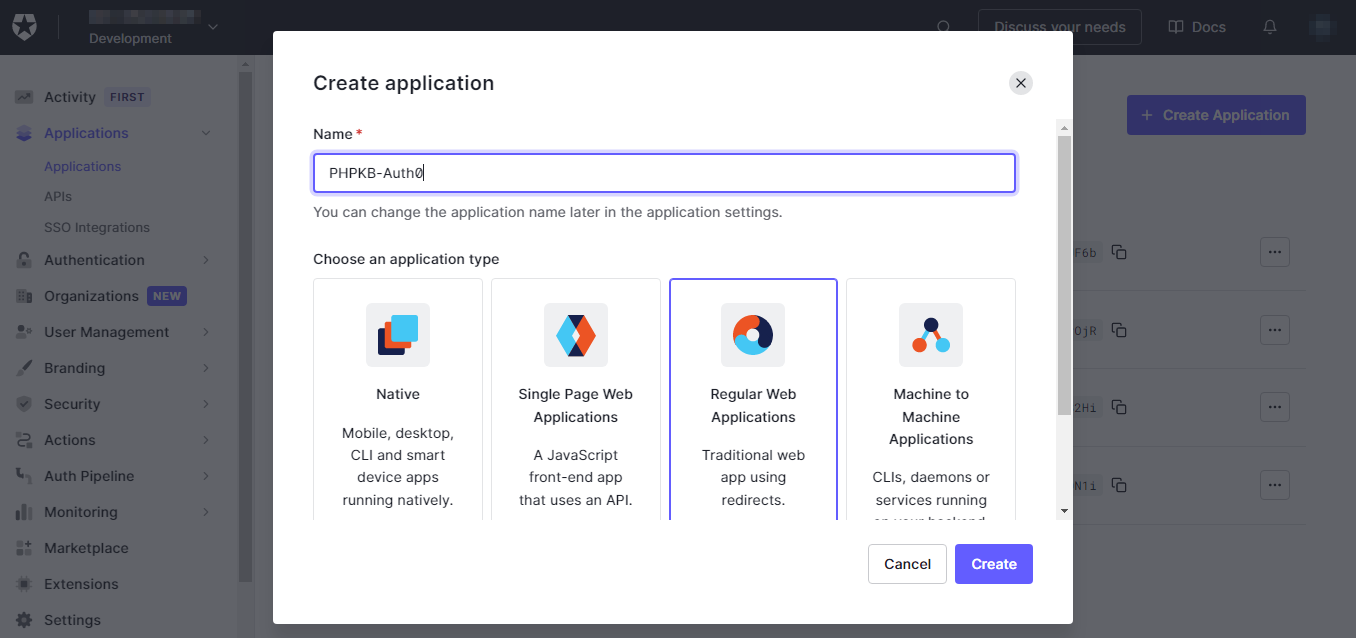
- Enter the Name of your application and select Choose an application type as Regular Web Applications and click on the Create button.
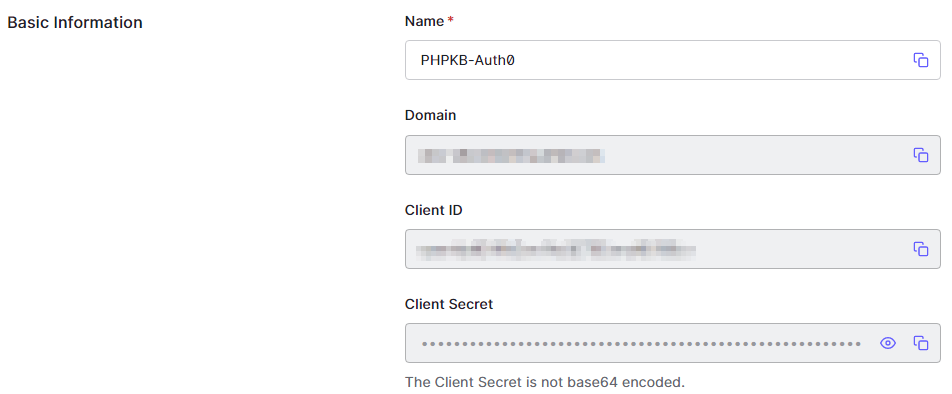
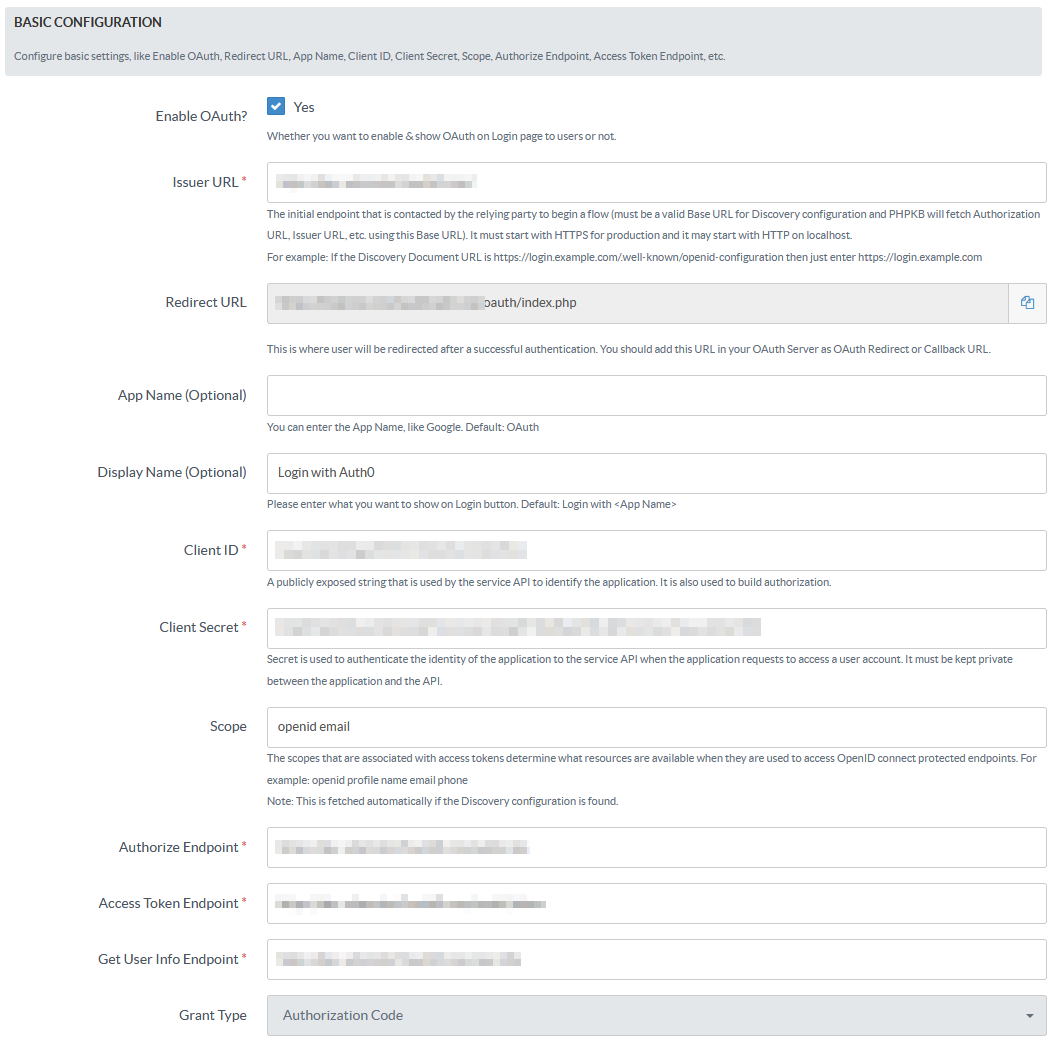
- Once your application has been created, it will be opened by default, select the Settings tab (next to the "Quick Start" tab), you will see the Basic Information section, and since you have already logged in to the Administrator Control Panel of PHPKB, copy the Client ID and Client Secret from this screen (Auth0 Settings), and paste them, one by one, in the Tools > OAuth > Client ID and Client Secret input boxes.
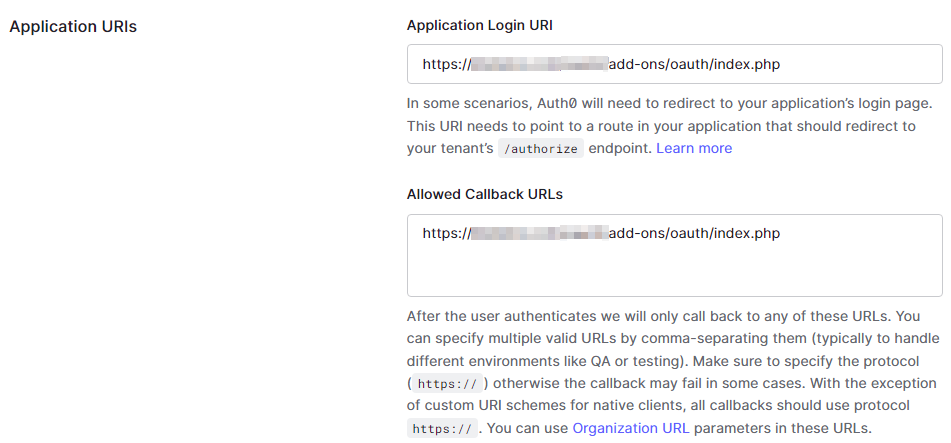
- Then scroll down to the Application URIs section, paste the Redirect URL (by copying from Tools > OAuth > Basic Configuration section > Redirect URL) in the Application Login URI & Allowed Callback URL input boxes.
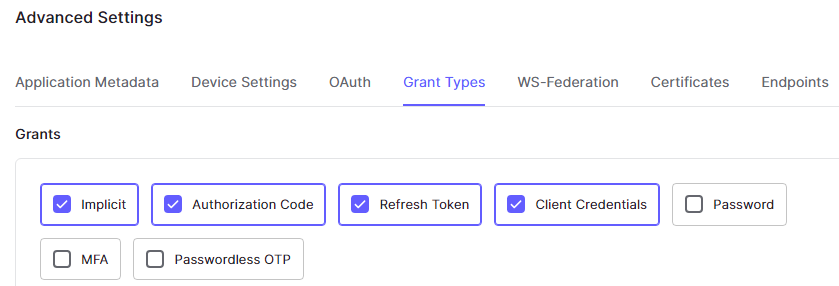
- Now, scroll down further, click on the Advanced Settings section, click on the Grant Types and make sure these are selected (especially the Authorization Code option), and update it in the Tools > OAuth > Grant Type option. (Default: Authorization Code)
- After enabling the desired Grant Types, expand Endpoints, copy the values in fields 1, 2 & 3 (as shown in the screenshot below), and paste them in the Tools > OAuth > Authorize Endpoint, Access Token Endpoint & Get User Info Endpoint input boxes respectively.

- Thereafter, copy the last URL (i.e. #4 as shown in the screenshot at Step 8), open a new tab/window, and at this point, copy the issuer URL (without quotes) from the JSON data, and paste it into the Tools > OAuth > Issuer URL box.
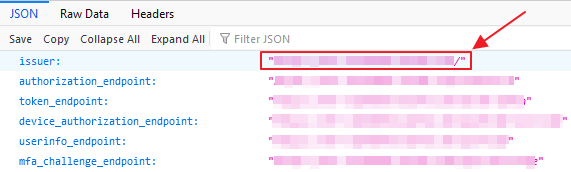
Note: If you have installed any JSON Viewer extension in your browser then it would output the JSON data in a friendly & readable format, otherwise, you would see it as raw output (unformatted).
- Let us configure the other settings.
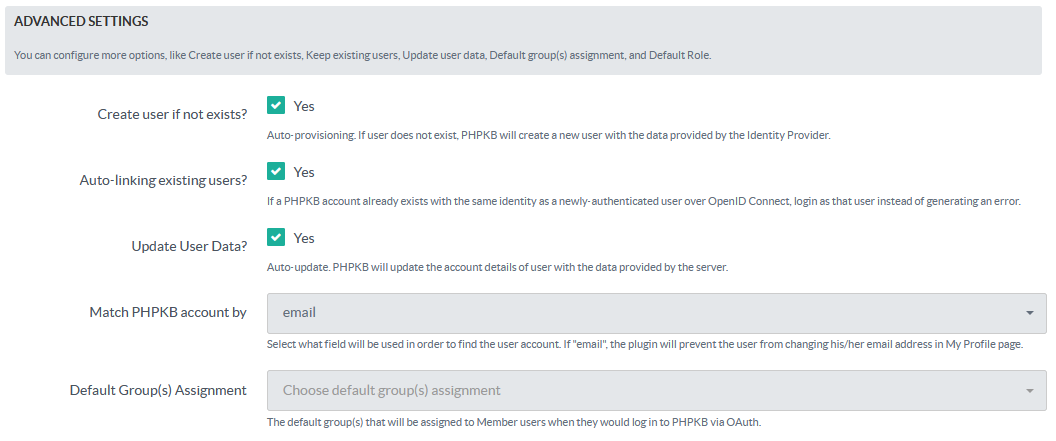
- Now configure the Advanced Settings section.
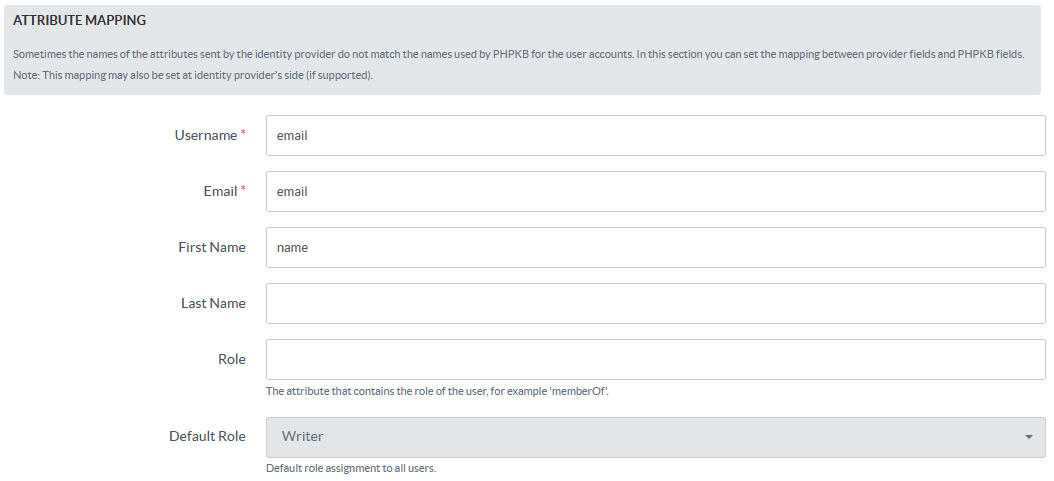
- Then configure the Attribute Mapping section.
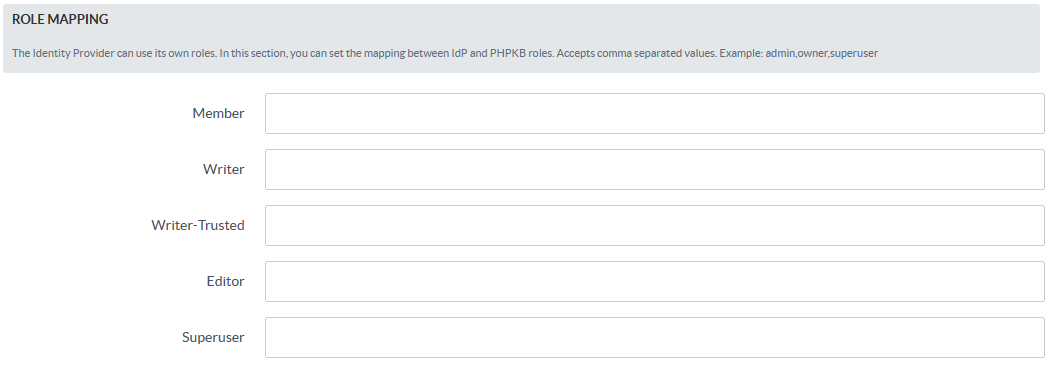
- The next is the Role Mapping section where you can map the roles returned by your IdP with the roles that are available in PHPKB.
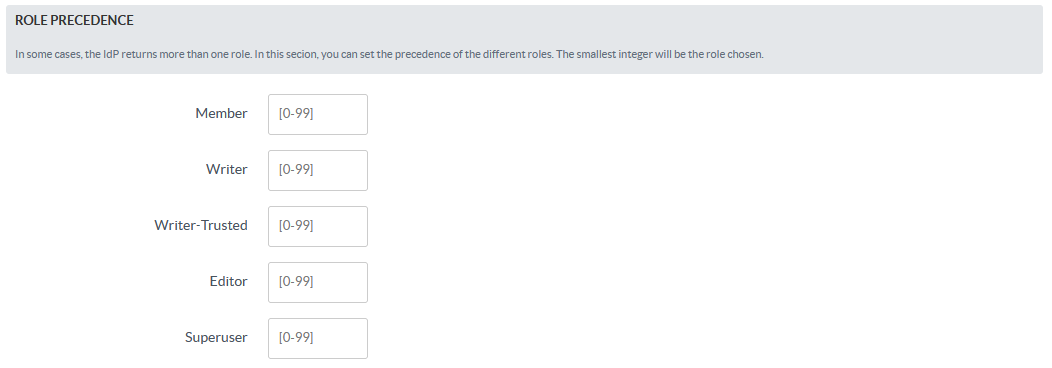
- Then you can set Role Precedence for different roles.
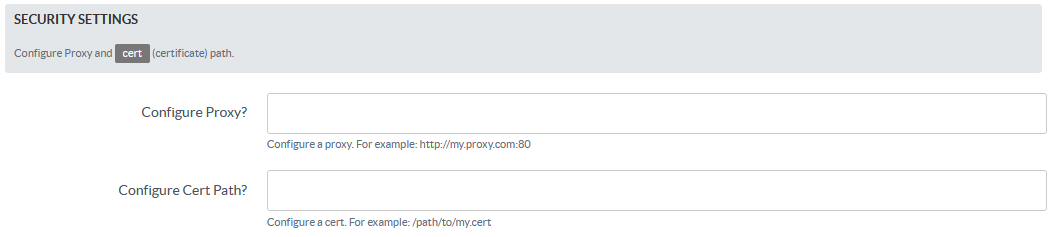
- Finally, set up Security Settings accordingly (if needed).
- Test the configuration by going to the Login page (either in the Public area or Admin area, if Default Role is not set to Member).
That’s all!