Managing Templates
Estimated Reading Time: 2 MinutesExpand " Articles " section in the left navigation bar and click on " Article Templates " link to open ’Manage Templates’ page. In multi-language edition, you can select the language from language drop-down available on the right side of the page to view the templates of that language.

- ID: This column depicts the auto generated unique ID assigned to the template in the knowledge base.
- Title: This column shows the name of the template assigned by you.
- Author: This column displays name of the person who created the template.
- Status: This column displays whether the template is active or not. Tick icon in column shows that template is active and can be inserted in the article when needed. Whereas, a cross icon shows that template is not active and cannot be inserted into the article. You can click on the icon to change its status.
- Default: This column shows the template item that has been set as default by you. Article content field on add article screen is populated with the contents of the default template. One default template per language is allowed in the knowledge base. Click on " Set Default " to set the template as default.
- Updated on: This column displays the date and time the template was last modified.
- Actions: This column contains two operations that can be performed on the template.
- Edit - Click to modify the template.
- Delete - Click to remove the template from the knowledge base.
- You can use " Select Bulk Actions " to perform the same operation on more than one template. For this, you need to mark the check boxes corresponding to templates on which operation is required, then choose a bulk action and click on apply.
How to insert a template into an article?
- Click on the Article Templates button available in the WYSIWYG editor as shown in the figure below:

- When you click on Article Template button, a dialog named Article Templates will be opened with the list of all the visible templates as shown in the screenshot below.
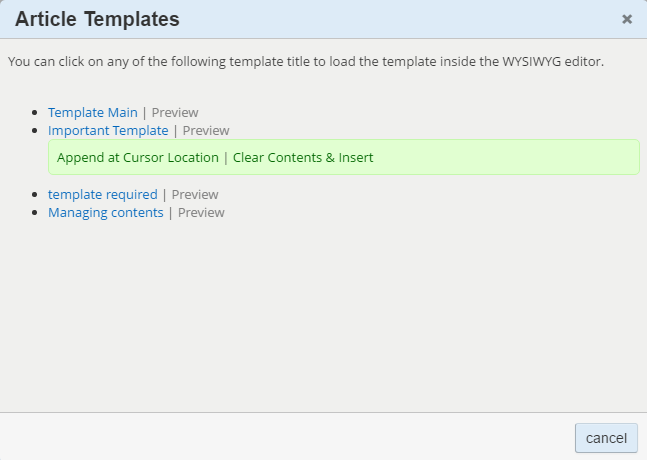
- Click on the template title to insert template. It can be inserted in two ways:
- Append at cursor location - Click to insert the template where the cursor is currently located. It does not affect the existing contents present in the editor.
- Clear Contents & Insert - Click to replace the contents of an editor with the template contents.
- Applicable To: Standard Edition, Standard (Multi-Language) Edition, Enterprise Edition (MySQL), Enterprise Multi-Language Edition (MySQL), Enterprise Edition (SQL Server), Enterprise Multi-Language Edition (SQL Server)
What happens if you need to modify the template? Is there any way to update all articles that have that template applied?