Adding a new category
Estimated Reading Time: 2 MinutesTo add a new category, you should be logged in to the admin area either as a SUPERUSER or as an EDITOR. Only these user-levels have the right to manage categories in the admin area. Once you are logged in, follow the steps given below.
- Expand the "Categories" section in the left navigation bar.
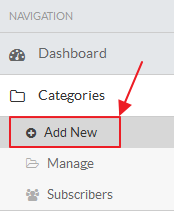
- Click on "Add New" link to open "Add New Category" page as shown in the screenshot below.
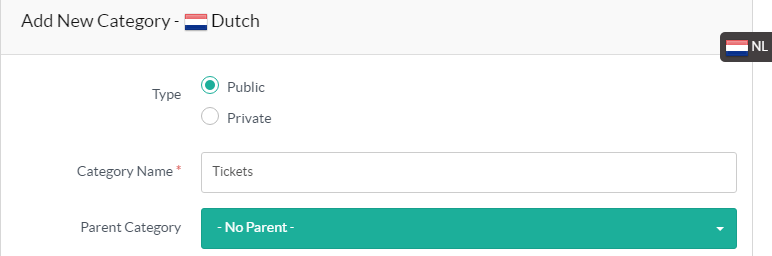
- In ML editions, the language in which the category will be created is displayed with panel heading. As an example, in the screenshot below, Dutch is displayed but you can change the language from language drop-down available on the right side of the page. (Refer article Admin Control Panel Interfacefor more details).
- Select the type of category you wish to create; PUBLIC or PRIVATE. It is important to know the difference between public and private types to properly categorize the knowledge base content. If you create a PUBLIC category then it will be accessible to all users including guest users. However, if you create a PRIVATE category then it will be accessible only to logged in users.
Access to private categories can further be restricted with the help of groups (Refer article Adding a User Group) so that users of a particular group have access to the categories assigned to them. - Specify a name (title) for the new category.
- Select the parent, if you wish to create the new category as a child of another category. Select "No Parent" to create it as a root-level category.
- You can specify an optional description for the new category in the description field. It can be up to 250 characters at the maximum.
- You can select an icon for the new category from the list of available options (feature available only in enterprise editions). By default, folder icon
 will be assigned.
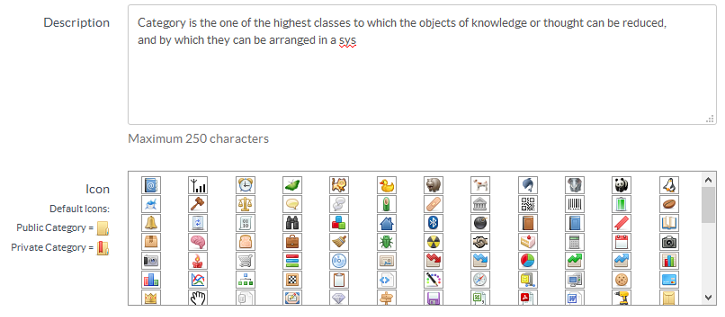
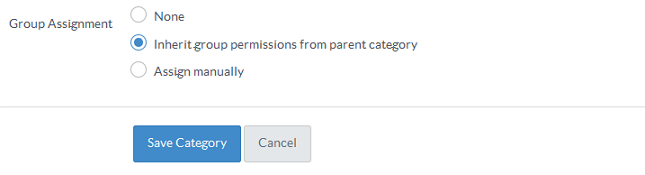
If you wish to assign the new category to an existing USER GROUP, select either ’Inherit group permissions from parent category’ option or ’Assign manually’ option in GROUP ASSIGNMENT. Inherit group permissions from parent category option will assign the category to all those groups to which its parent is associated. Assign manually will display the list of groups and you can choose the groups as per your requirement. - Click on "Save Category" button to save the category in the knowledge base.
- Applicable To: Standard Edition, Standard (Multi-Language) Edition, Enterprise Edition (MySQL), Enterprise Multi-Language Edition (MySQL), Enterprise Edition (SQL Server), Enterprise Multi-Language Edition (SQL Server)