Configuring Azure AD with PHPKB SAML Single Sign-On (SSO) Plugin
Estimated Reading Time: 4 MinutesIn this article, we will guide you with steps on how to configure Azure AD with the SAML Single Sign-On (SSO) Plugin of PHPKB knowledge base software.
Configuring Azure AD with SAML SSO Plugin
You need to be logged in to the admin control panel of PHPKB software with the Superuser account. Once you are logged in as a superuser, please follow the instructions given below,
-
Configure Azure AD as Identity Provider (IdP)
- In Tools > Manage Settings > SAML tab, click View Metadata of this SP button. Here, you can find the SP metadata such as SP Entity ID and ACS (AssertionConsumerService) URL which are required to configure the Identity Provider.
- Log in to Azure AD Portal
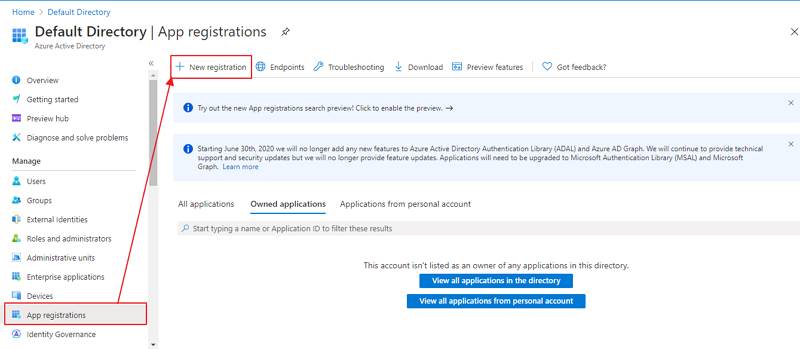
- Select Azure Active Directory > App registrations and click on the New registration option:
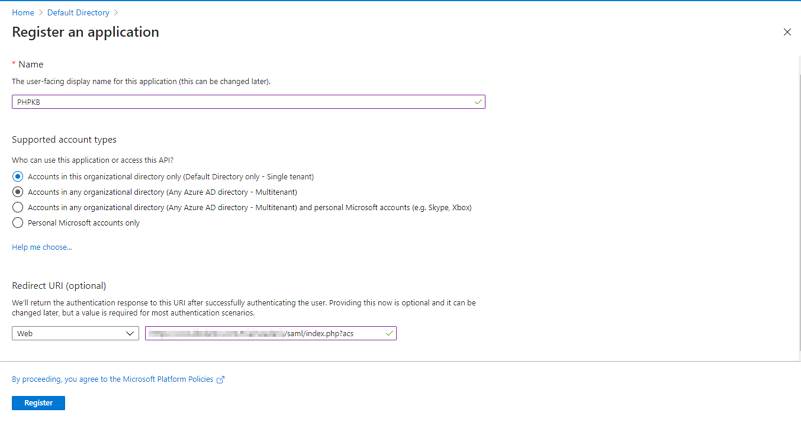
- Assign a Name and choose the account type. In the Redirect URI field, provide the ACS URL provided in the View Metadata of this SP and click on the Register button:
- Navigate to Expose an API menu option and click the Set button and replace the APPLICATION ID URI with the Service Provider Entity ID (provided in the View Metadata of this SP). Alternatively, you can set this value (start copying after “//” (double slash), for example: b23eaba2-5499-40d3-80fa-7cf5f432cefb) in Manage Settings > SAML tab > Service Provider Entity ID (SP Entity ID) field:
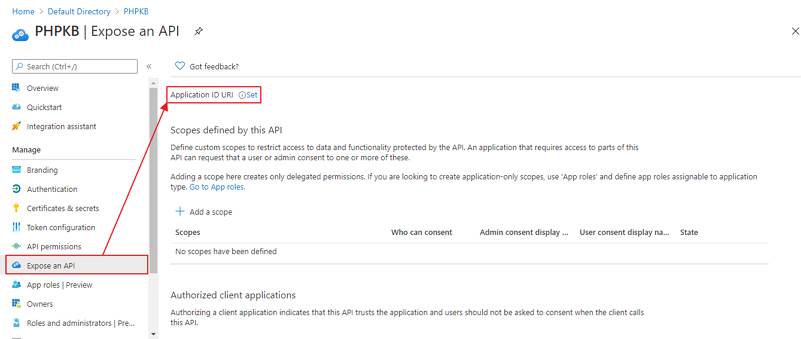
NOTE: Please ensure that the SP Entity ID value from the View Metadata of this SP does not have a trailing slash(’/’). If SP Entity ID has a trailing slash then update it by removing the trailing slash from the SP EntityID / Issuer field under the Service Provider Metadata tab of the plugin, enter the updated value at Azure and click on the Save button.
- Go back to Azure Active Directory > App Registrations window and click on the Endpoints option:

-
Configuring PHPKB as Service Provider (SP)
- Login to PHPKB Admin Panel with the superuser credentials.
- Go to Tools > SAML Authentication tab and configure PHPKB as Service Provider (SP). Provide the required settings (i.e. IdP Entity ID or Issuer, SSO Service URL, or Login URL) as provided by your Identity Provider.
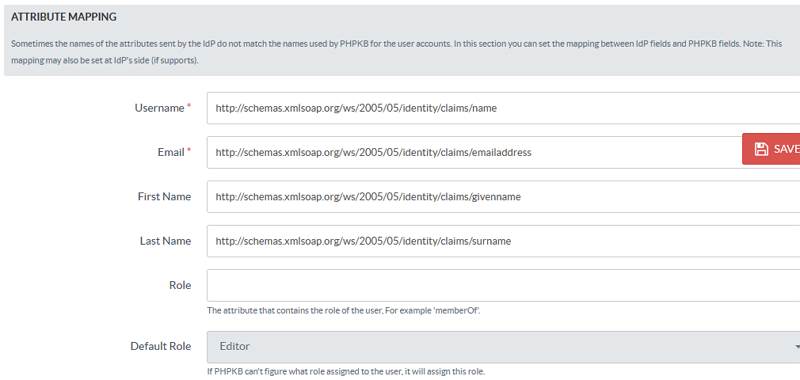
- Attribute Mapping: The Attribute Mapping feature allows you to map the user attributes sent by the IdP during SSO to the user attributes at PHPKB. In the Tools > SAML Authentication tab, go to the Attribute Mapping section, and fill up the following fields in the Attribute Mapping section.
-
Role Mapping
- This feature allows you to assign and manage the roles of the users when they perform SSO because IdP can use its own roles.
- From the Role Mapping section of the SAML tab, provide a mapping for the field named Writer, Editor, etc. This attribute will contain the role-related information sent by the IdP and will be used for Role Mapping.
- Navigate to the role mapping section and provide the mappings for the highlighted roles as comma-separated-values (CSV) of their IdP roles.
Example: If you wish to assign the PHPKB user-level "Superuser" to the Azure AD "Application Administrator", "Knowledge Administrator", "Knowledge Manager", and "Helpdesk Administrator" roles, then put them as comma-separated-values next to the "Superuser" field shown below. You may wish to refer to the default roles available in Azure AD.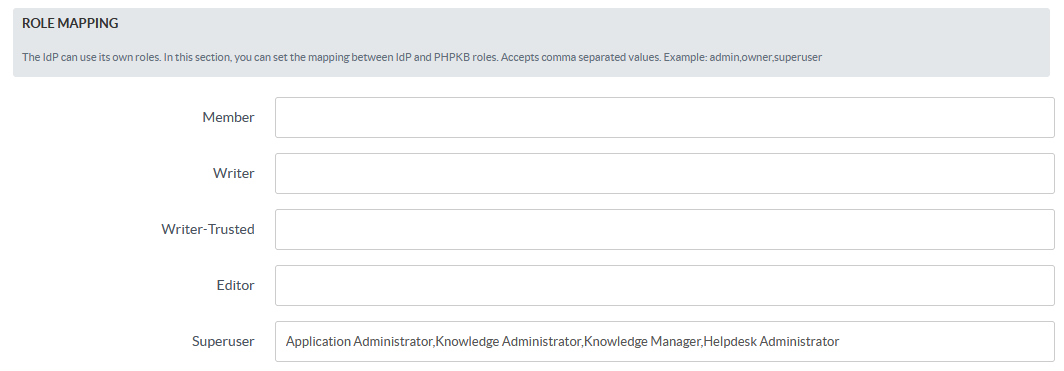
-
Role Precedence
In some cases, the IdP returns more than one role. In this section, you can set the precedence of the different roles. The smallest integer will be the role chosen.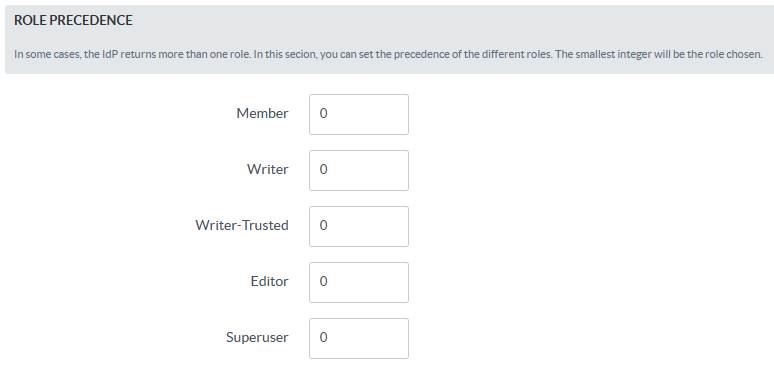
-
Advanced Settings
Handle some other parameters related to customizations and security issues. If signing/encryption is enabled, then x509 cert and private key for the SP must be provided. You can also enable the Debug Mode to get errors/warnings that happen during the SAML workflow.
Note: In the federationmetadata.xml file from Azure AD, there are four X509 certificates, and you can use the second one in the list, located under EntityDescriptor/RoleDescriptor/KeyDescriptor[2]/KeyInfo/X509DataX509Certificate.
Caution: Kindly be aware that, by default, Microsoft updates this certificate every 45 days, so the previous one will expire after this time, and you will have to update it manually.
- Applicable To: Enterprise Edition (MySQL), Enterprise Multi-Language Edition (MySQL), Enterprise Edition (SQL Server), Enterprise Multi-Language Edition (SQL Server)