Adding table of contents (TOC) to knowledge base articles
Estimated Reading Time: 2 MinutesPHPKB knowledge base software offers automated generation of a table of contents on any article of your knowledge base. This feature can scan the headings (H1 to H6) through your content and automatically create a table of contents which adds an easy-to-navigate section on the article page that helps users easily access the desired section. You can choose where to display the TOC in your articles. The table of contents by default appears before the first heading of an article. This allows the content author to insert lead-in content that may summarize or introduce the rest of the knowledge article.
How to add a Table of Contents in knowledge articles?
Follow the steps to insert a hierarchical table of contents based on the headings in your knowledge article.
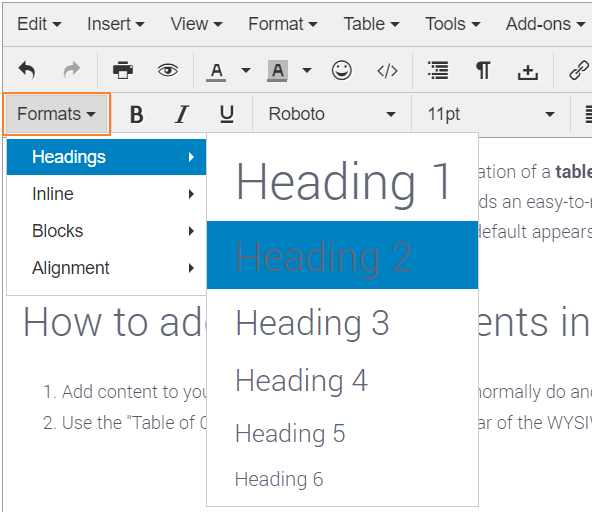
- Add content to your knowledge base article like you normally do and make sure to define headings/sub-headings using the "Format > Headings" menu available on the WYSIWYG editor as shown below. It is strongly advised to make use of heading tags <H1> through <H6> to define titles and sub-titles within your knowledge articles and this can be easily done using the "Formats" menu of the WYSIWYG editor as shown in the image below. As long as you have used proper heading tags (H1, H2, etc) in the content, a "Table of Contents" can be created at any time in your knowledge base article.
You can generate a table of contents only if your article uses heading levels from Heading 1 to Heading 6.
- Once the article content is ready, use the "Table of Contents" button available on the toolbar of the WYSIWYG editor (as shown below) to insert the TOC at the cursor location.

Clicking on this button will activate the scan of headings (H1 to H6) through your article content. Once done, it will prepare a table of contents section with the list of all headings/sub-headings and start displaying it in your article at the desired location. The links to heading levels are indented to show the heading hierarchy. - If you have made changes to an existing article and wish to update the TOC with the latest changes OR change the position of the TOC from vertical to horizontal, please click on the existing "Table of Contents" section to select it, then you will see a floating toolbar with some buttons as shown below.
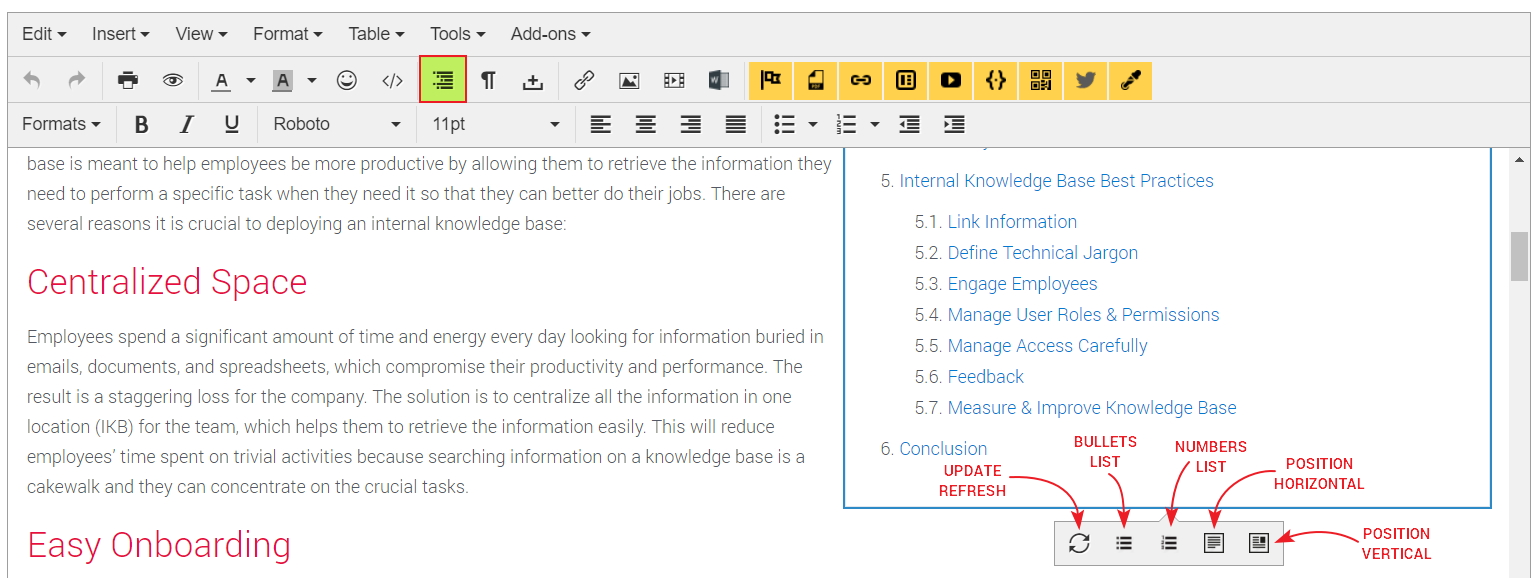
- Click on the respective button to perform the required action and click "Update" to save changes to your knowledge base article.