Adding a new article
Estimated Reading Time: 3 MinutesThis article will provide detailed information (step-by-step instructions) on how to add/create a new article in the knowledge base using PHPKB software. There is a video guide at the bottom that demonstrates these steps to create a new article in the knowledge base.
Steps to add an article are as follows:
- Expand the "Articles" section in the left navigation bar and click on the "Add new" link to open the "Add Article" page.

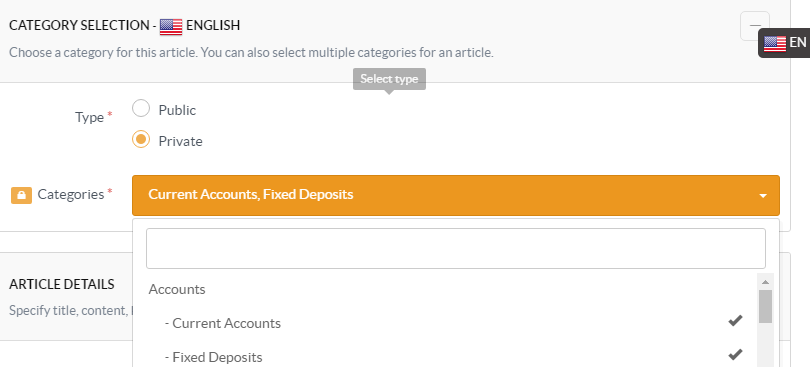
- Select the "Type" of the category. With Public type, an article will be published under public categories and will be accessible by all end users. With the Private type, the article will be visible to logged-in users only.
- In the multi-language edition, the language name in which the article is being created is mentioned with panel heading. As shown in the screenshot below, an article is being added to the English language, so, English is written with the panel heading 'Category Selection'. You can change the language from the language drop-down available on the right side, whereas, in non ML editions, the language menu is not available.
- "Choose Categories" as per the requirement of the article. The article can be assigned to multiple categories, by selecting them from the categories drop-down.
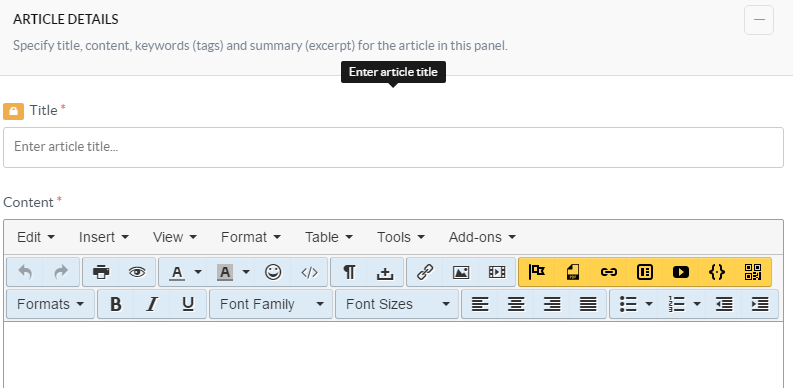
- "Title" can be a question, a caption or a headline of your article. It is not allowed to add multiple articles with the same title under one category.
- "Content" inscribes the body of the article. PHPKB provides a powerful WYSIWYG editor with various features for formatting your content just like MS-Word.
- "Keywords" are the important words that classify your article and are relevant for searching through the database.
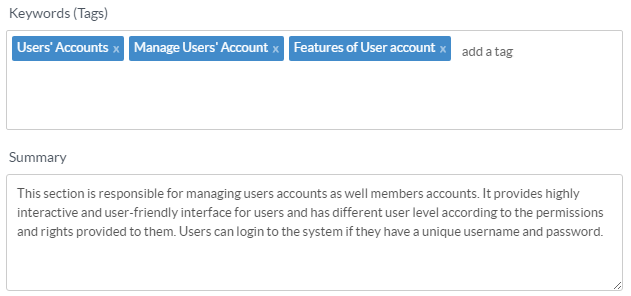
- "Summary" is a compact view of your article for the meta description attribute. Search engines may present this summary (if they think it's relevant to the search query) on the results page below the page title.
- "Article Options" provide various options for authors to control visibility, comments, ratings, publishing, and expiry date of the article.
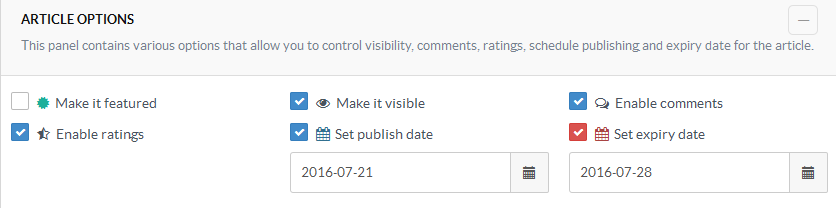
- Make it Featured: Mark this as a featured article if you want the article to appear in the “Featured Articles” section of your knowledge base.
- Make it Visible: Uncheck this if you do not want the article to be visible to end-users (front-end users).
- Enable Comments: Uncheck this if you do not want to allow users to post comments on this article.
- Enable Ratings: Uncheck this if you want to turn off the ratings for this article.
- Set Publish Date: Publish date is a date on which the article is planned to be published. Check this checkbox to set a publish date from the date calendar.
- Set Expiry Date: Check this to set the time limit up to when the article will be accessible by front-end users. You can set the expiry date in between 365 days from the current date.
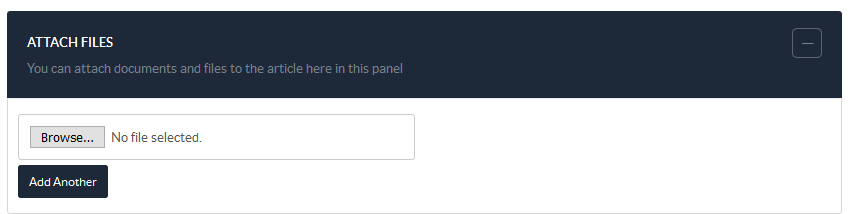
- A user can "Attach Files" and documents related to the article.
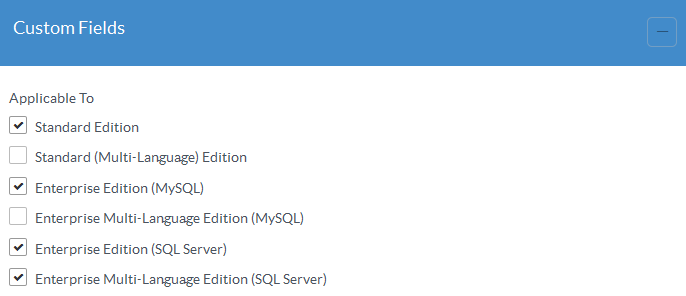
- "Custom Fields" display the custom fields you have created for your knowledge base articles. Refer article Adding a Custom Field for more details.
- Click the "Preview Article" button to preview the article (even unsaved) with the latest changes as it will be published to the front-end users. Authors are advised to preview the article once before publishing.
- Click the "Save as Draft" button to save changes as your personal draft. You can continue to edit this draft later on and can save it as an article or delete it.
- Click the "Save Article" button to store your changes and publish the article in the knowledge base.
- Click the "Cancel" button to return to the 'Manage articles' screen without saving the changes you have made in the article.

Video Guide
- Applicable To: Standard Edition
Is there a way that we can send an email to a specific address which would in turn automatically create a Knowledge Base article?
I wish there was a way to have multiple authors assigned to a single article. We have everyone in the lowest tier admin permission group and it appears they can only see articles to which they are the assigned owner. If we have multiple people in a department with the authority to make changes, we must change the author as a super admin to give them visibility. I wish I could assign multiple authors to individual articles.
Hi. I am trying to put a pdf/word file into the actual article (it is a standard of procedures article) in the table so that viewers can click on the file versus scrolling to the bottom of the article and hunting for the attachment. Is that a possibility? Thank you